

Guardrails is the runtime view. Policies is where they come from. A guardrail rule on this page was either hand-built here, or compiled from a policy — a versioned document authored in the dashboard’s Policies section or as a YAML file in your repository. Guardrails shows what’s enforcing and what fired; Policies is where you author, review, backtest, and apply the change. This page’s ownership model — Code-managed vs. dashboard-managed, and Detach — is the same mechanism either way.
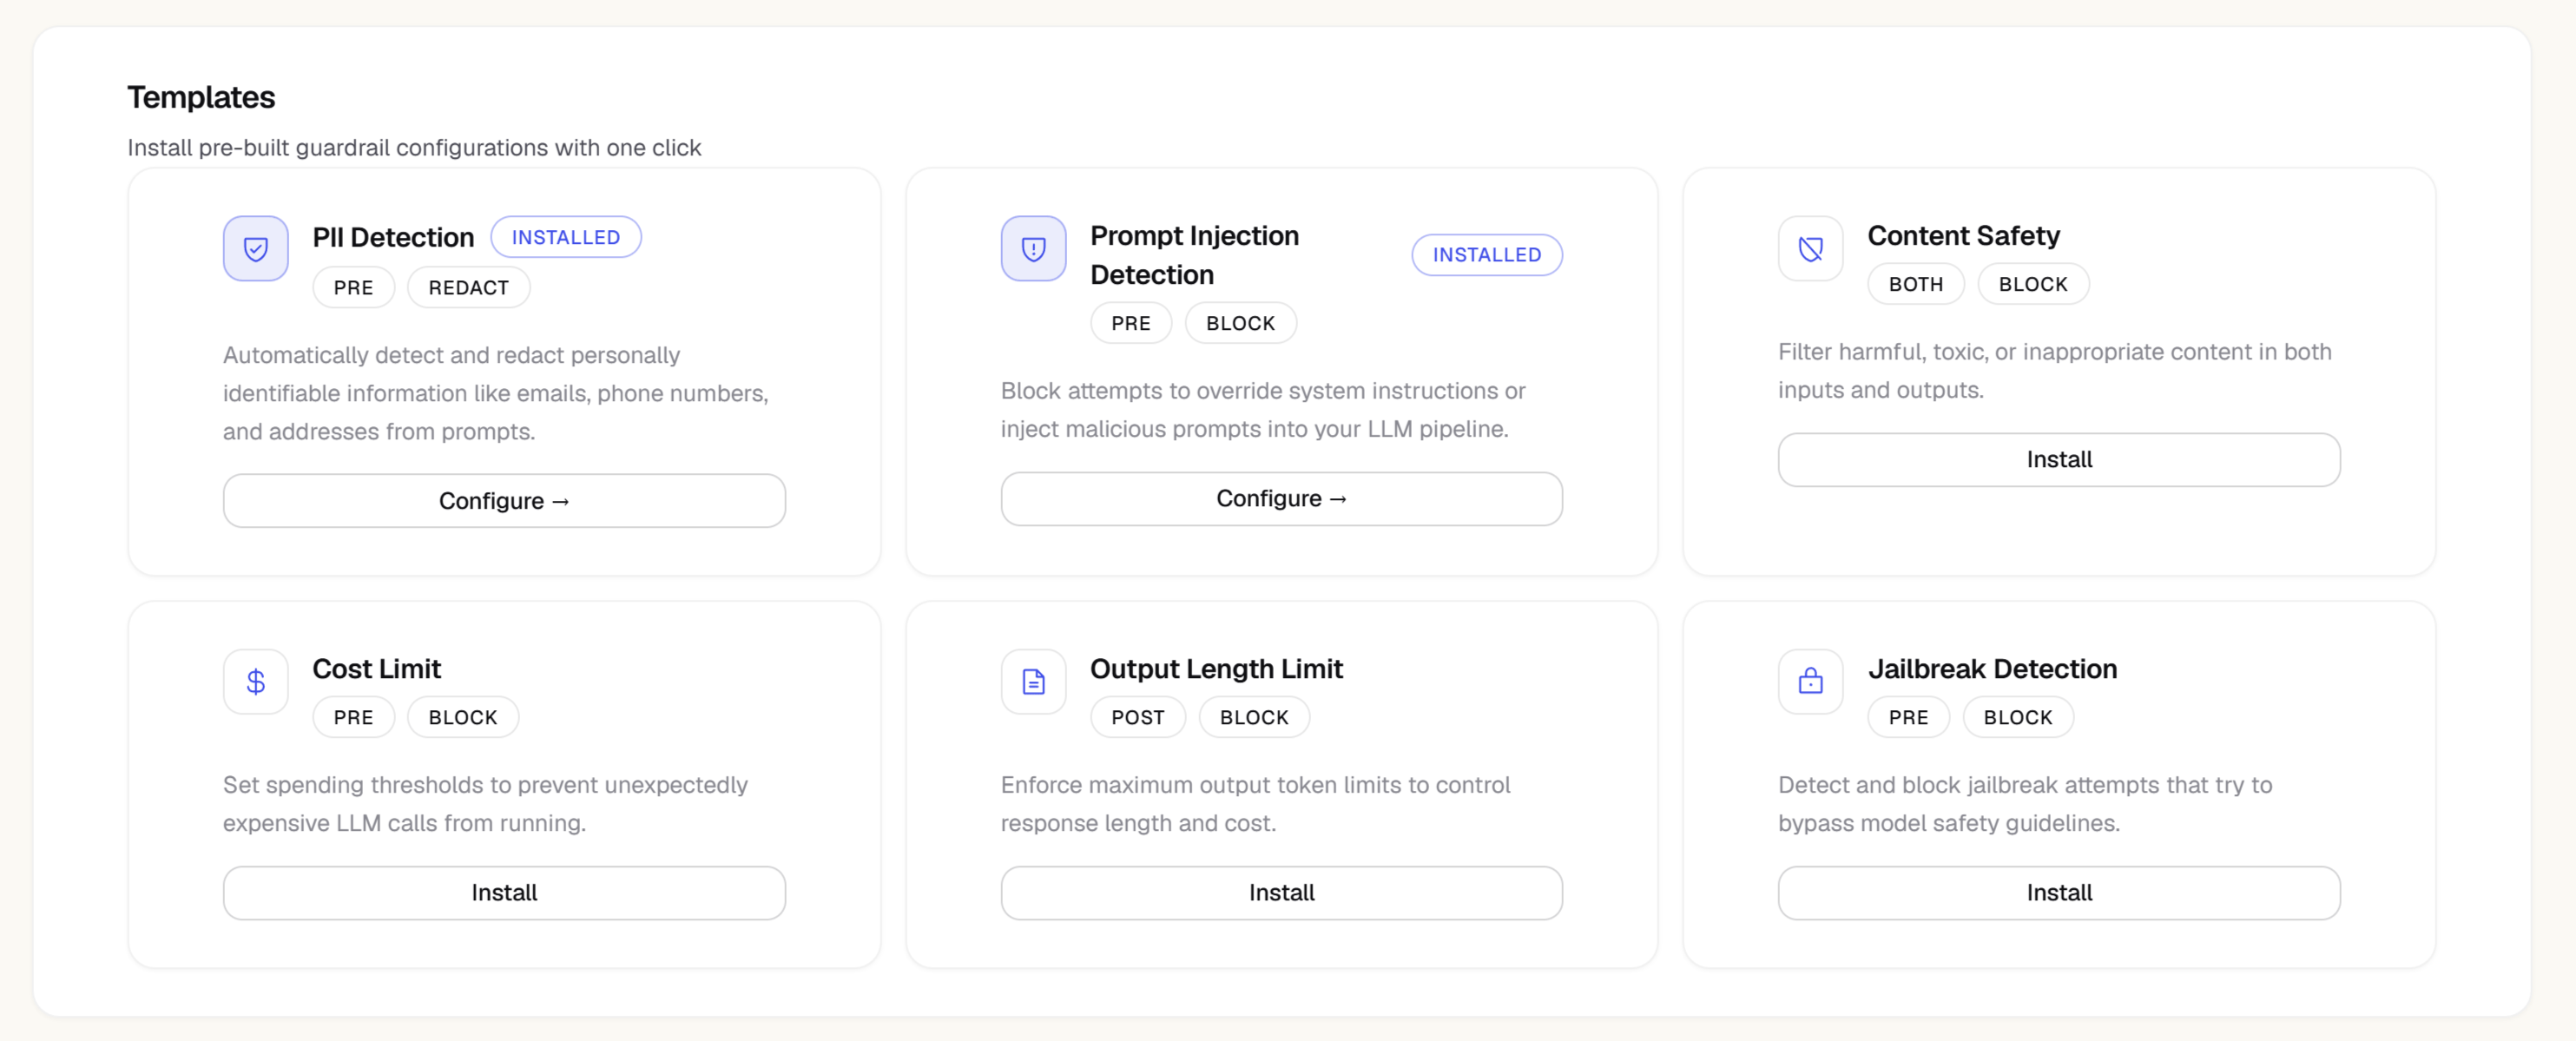
The Guardrails page — and every action on it (create, enable, disable, delete, install from a template) — is available on the Solo plan and above. The Free plan has no access.
How guardrails work
When your SDK is initialized withguardrails: true on a provider wrapper, it sends a check request to POST /v1/guardrails/check before the LLM call (pre-check) and after the LLM response (post-check). The backend evaluates all active policies for your project against the content and returns a verdict.
The SDK receives the verdict and either:
- Allows the call to proceed normally
- Blocks it by throwing a
GuardrailBlockedError - Redacts sensitive content and substitutes the cleaned text
- Warns (logs the trigger but allows the call through)
Creating a guardrail
Every guardrail is created from one page — there’s no separate “quick install” grid or creation dialog. Add guardrail on the Guardrails page always opens it.1
Open the Guardrails page
Navigate to Guardrails in the left sidebar.
2
Click Add guardrail
Opens the guardrail-creation page.
3
Start from a template, or from scratch
Pick a starting point from the Content or Agent safety template chips at the top of the page — each pre-fills a working configuration (type, phase, action, and default settings) for one of the guardrail types below — or click Blank to start from an empty draft. Below the chips, Preset templates (bundles Zespan maintains and auto-updates) and Your templates (custom bundles saved for this project) are also available — see Guardrail templates.
The following types apply specifically to agent traces — they inspect tool calls and agent names rather than raw prompt/response text:
4
Name it
Give it a descriptive name that explains what it protects against, e.g.
block-competitor-mentions or toxicity-filter.5
Choose phase and action
Phase selects whether the check runs pre-LLM (the prompt), post-LLM (the completion), or both — the pipeline preview above the fields shows which stages are solid (checked) versus dashed (skipped) as you change it. Action selects what happens when the guardrail triggers:
- Block — reject the request and throw
GuardrailBlockedErrorin the SDK - Redact — remove the matched content and use the cleaned text
- Warn — allow the request but surface the trigger as a warning
- Log — allow the request and record the trigger in execution history, without surfacing it as a warning (useful while you’re still tuning a new policy)
6
Configure the type-specific settings
Fill in the fields for the type you picked. For keyword-based types (topic boundary, scope enforcement, tool misuse allow/blocklists), enter the terms. For regex, enter the patterns. For toxicity and prompt-injection types, pick a sensitivity level (low/medium/high). For PII detection, choose a compliance preset and, optionally, fine-tune the confidence threshold under advanced detection. For custom LLM judge, write your evaluation prompt.
7
Set advanced options (optional)
Open Advanced settings to set max latency, priority (lower numbers run first), whether the rule applies project-wide or only to specific agents, and whether it’s enabled on create.
8
Test, then create
The right-hand column runs a client-side Live preview against sample text as you configure, and a Deterministic test panel that evaluates your unsaved draft against the real guardrail engine. Once you’re happy with the result, click Create guardrail in the sticky footer. The guardrail activates immediately — all subsequent SDK check requests will include it.
Promoting a violation to a policy
Every guardrail hit recorded against a trace can become a permanent rule with one click, right from where it happened — no need to reconstruct the pattern from scratch.1
Open the trace
Find the trace with the violation you want to codify. The guardrail hit shows as its own span in the flame graph, colored to match its outcome.
2
Open the guardrail span
Click it to see the policy, the check phase, and the exact value that triggered it.
3
Click Promote to Policy
Zespan pre-fills a new guardrail draft with the same tool, field, and value that triggered the violation.
4
Review and save
Adjust the draft if you want — tighten a keyword list, change the action, scope it to specific agents — then save it like any other guardrail.
Guardrail templates
Instead of creating guardrails one at a time, you can bundle several rules into a reusable template and apply that bundle to a project (optionally scoped to specific agents, the same way a single guardrail can be). Templates live on the guardrail-creation page (Add guardrail), below the built-in template chips described in Creating a guardrail — there’s no separate templates tab. Zespan ships a set of preset templates that are managed and auto-updated with new threat patterns:
Under Preset templates and Your templates you can:
- Apply a preset or a custom template to your project, project-wide or scoped to specific agents
- Clone a preset into an editable copy you can tweak (presets themselves can’t be edited or deleted)
- Create your own template from scratch by combining any of the guardrail types above into one bundle
- Edit or delete your own templates, and remove an application without deleting the template itself
Managing guardrails
The Guardrails page has two tabs: Rules and Activity.Status band
At the top of the page, a single status band answers “what’s running and is anything wrong”:- A posture headline — “Fully protected”, “N protections active, M gaps”, or “Your agents are running unguarded” — plus an N of 5 active count, scored across five protection categories: PII, Injection, Content, Cost, and Secrets.
- Any category with no active rule shows as a chip (e.g. Secrets +) that links straight to Add guardrail so you can close the gap.
- A stat line for the selected time range: checks, blocked, redacted, avg check latency, and block rate, with a small block-rate sparkline.
Rules table
The Rules tab lists every guardrail as a row, sorted by phase (pre, then both, then post) and then by priority within each phase:
Each row has a ⋯ menu with Configure (opens the guardrail’s detail page), Enable/Disable, and Delete. A code-managed row only offers Configure — see Dashboard-managed vs code-managed.
Click a guardrail’s name (or Configure) to open its detail page, with Configure, Test, and Logs tabs for editing settings, running the guardrail against sample text, and reviewing its recent trigger history. The Configure tab also shows the pipeline diagram — the same Pre → Both → Post chain that used to sit on the landing page — highlighting where this specific rule sits.
Activity tab
The Activity tab is the project-wide event log — see Execution history.Dashboard-managed vs code-managed
A guardrail can be owned either by the dashboard or by a policy file in your repository. Code-owned guardrails carry a Code-managed badge in the Rules table’s Rule column, with the file path in the tooltip. On a code-managed guardrail’s detail page:- The settings form is read-only, and a banner names the file that owns it:
Managed in
policies/hipaa-phi-egress.yaml. Edit it there, or Detach to take over from the dashboard. - The Delete button is replaced by Detach.
- Enable/disable and delete are unavailable from the row’s ⋯ menu — only Configure shows.
zespan policy apply, with nothing to warn you it had happened.
Detaching
Detach hands ownership of that policy to the dashboard: the form becomes editable immediately, and the nextzespan policy apply reports the policy as a
conflict and refuses to overwrite it without --force. Use it when you need to
change a control faster than a pull request allows — during an incident, for
example — then fold the change back into the file afterwards.
Detaching is recorded in the audit log as policy.detached.
Detach requires the same permission as applying policies: owner or
admin. Editors can view a code-managed guardrail but not take it over.
Adopting a dashboard guardrail into code
If you want a guardrail you built here to live in git instead, you do not have to rewrite it:zespan policy pull generates the file from what already exists,
and zespan policy apply --adopt takes it over in place — the guardrail
keeps its id, so its execution history and metrics carry over unchanged. See
Adopting a project that already has guardrails.
Reviewing and applying a policy’s changes
For a policy authored in the dashboard, reviewing and applying its pending changes now lives in Policies — open the policy from its inventory row and use Review changes on its detail page. That screen renders exactly whatzespan policy plan would print for the same change,
computed through the same endpoint, so the two can never disagree. Reviewing
needs only policy:read, which every role has; applying needs
policy:apply.
For policy files that haven’t been committed to your repository yet, the
equivalent check is zespan policy plan from the CLI — see
zespan policy.
Execution history
The Guardrails page’s Activity tab is a log of recent guardrail events, filterable by rule (and each guardrail’s own detail-page Logs tab shows just its events), with:- Timestamp
- The guardrail and check phase (pre/post)
- The action taken (blocked, redacted, warned, logged)
- The reason the guardrail triggered (e.g. which PII types or keyword matched — not the full prompt)
- A link to the underlying trace
Testing a guardrail
Every guardrail (and the form for a new one) has a test panel where you can paste sample text and run it through the guardrail’s current configuration — this evaluates the real rule synchronously and returns a verdict, without needing a live trace from your application:- While creating a guardrail, the test panel runs against your unsaved draft settings
- On an existing guardrail’s Test tab, it runs against the saved configuration
- You can optionally supply a model name, operation name, estimated cost, and input token count — the cost ceiling type checks these directly
- The result shows an overall Allowed / Blocked verdict, the modified text (if a redact rule matched), and a per-guardrail breakdown of which rule fired, what action it took, whether it passed, and its latency
The test panel evaluates text content only. Agent-context checks that depend on the calling agent’s name or its recent tool calls — agent rate limit, tool misuse, loop detection, and delegation control — always pass in the test panel, since that context only exists on a real trace. Validate those types by checking their execution history after live traffic runs through them.
Latency impact
Guardrail checks add latency to your LLM calls. The check runs synchronously before (and optionally after) the LLM call. Typical check latency:Semantic Judge is the only type that calls a model for every check — every other type runs entirely on pattern matching, keyword lists, or counters. Raise a Semantic Judge guardrail’s max latency (Advanced settings) if you’re seeing timeouts with a slower judge model.
Human approval gates
Beyond automatic block, redact, and warn actions, the SDK exposes a real human-in-the-loop primitive:awaitApproval() pauses execution until an admin approves or rejects the call from the dashboard — not just a log entry, an actual gate your code waits on.
Near-miss capture and suggested rules
Zespan also learns from traffic that almost triggered a numeric guardrail rule but didn’t. When a threshold-based check —cost_ceiling, agent_rate_limit, and similar types — evaluates close to its limit without firing, that near-miss is logged instead of silently discarded.
A background worker clusters recurring near-misses into suggested policy rules, surfaced in a panel on the Guardrails page: “Your agents have hit this pattern 6 times this week — no rule governs it yet. Want one?”
- Click Promote to Policy on a suggestion you agree with — it reuses the same promote flow described above
- Click Dismiss to clear a suggestion that isn’t worth a standing rule
AI usage limits
A Semantic Judge (custom_llm) guardrail calls a model on every check, so unlike every other guardrail type it can’t run on pattern matching alone. Zespan runs these checks on its own key by default, metered against a monthly quota that scales with your plan:
The Guardrails page shows a live AI checks: used/limit this month chip whenever a project has an enabled Semantic Judge guardrail, turning amber at 80% of quota and red once it’s exhausted.
Once a project connects its own LLM (Settings → LLM Connections), Semantic Judge checks run on that connection instead — unmetered, at your own provider’s rates, with no monthly cap. The usage chip reflects this immediately: it stops showing a quota and shows “Using your own LLM connection” instead. If the platform quota is exhausted and no connection is configured, new checks fail closed according to the guardrail’s configured action (typically block) rather than silently allowing content through unchecked.
Plan requirement
The Guardrails page, and every action on it — creating, editing, enabling, disabling, deleting a guardrail, and installing a template — is available from the Solo plan up. The Free plan has no access.Next steps
Policies
Author, review, backtest, and apply policies from the dashboard.
Policy as code
Manage these policies as YAML in your repository, reviewed in pull requests.
Policy file reference
Every field in a policy file, and the supported YAML subset.
zespan policy
validate, plan and apply from the CLI or CI.
SDK guardrails
Enforce these policies from your application.
LLM Connections (BYOK)
Connect your own provider key to run Semantic Judge checks unmetered.