> ## Documentation Index
> Fetch the complete documentation index at: https://docs.zespan.com/llms.txt
> Use this file to discover all available pages before exploring further.
# Prompts — version, deploy, and gate your prompt library
> Store, version, label, and deploy prompt templates through a quality gate. Fetch prompts at runtime via the SDK so you can update them without redeploying.
The Prompts page is your prompt version control and release system. Every prompt change creates a new immutable version — previous versions are never overwritten. You promote a version to a label (`production` or `staging`), your running application fetches prompts by label at runtime using the SDK, and — before a risky change ships — you can run a **quality gate** that scores a candidate version against the current production baseline and blocks the release if it regresses.
## The prompt library
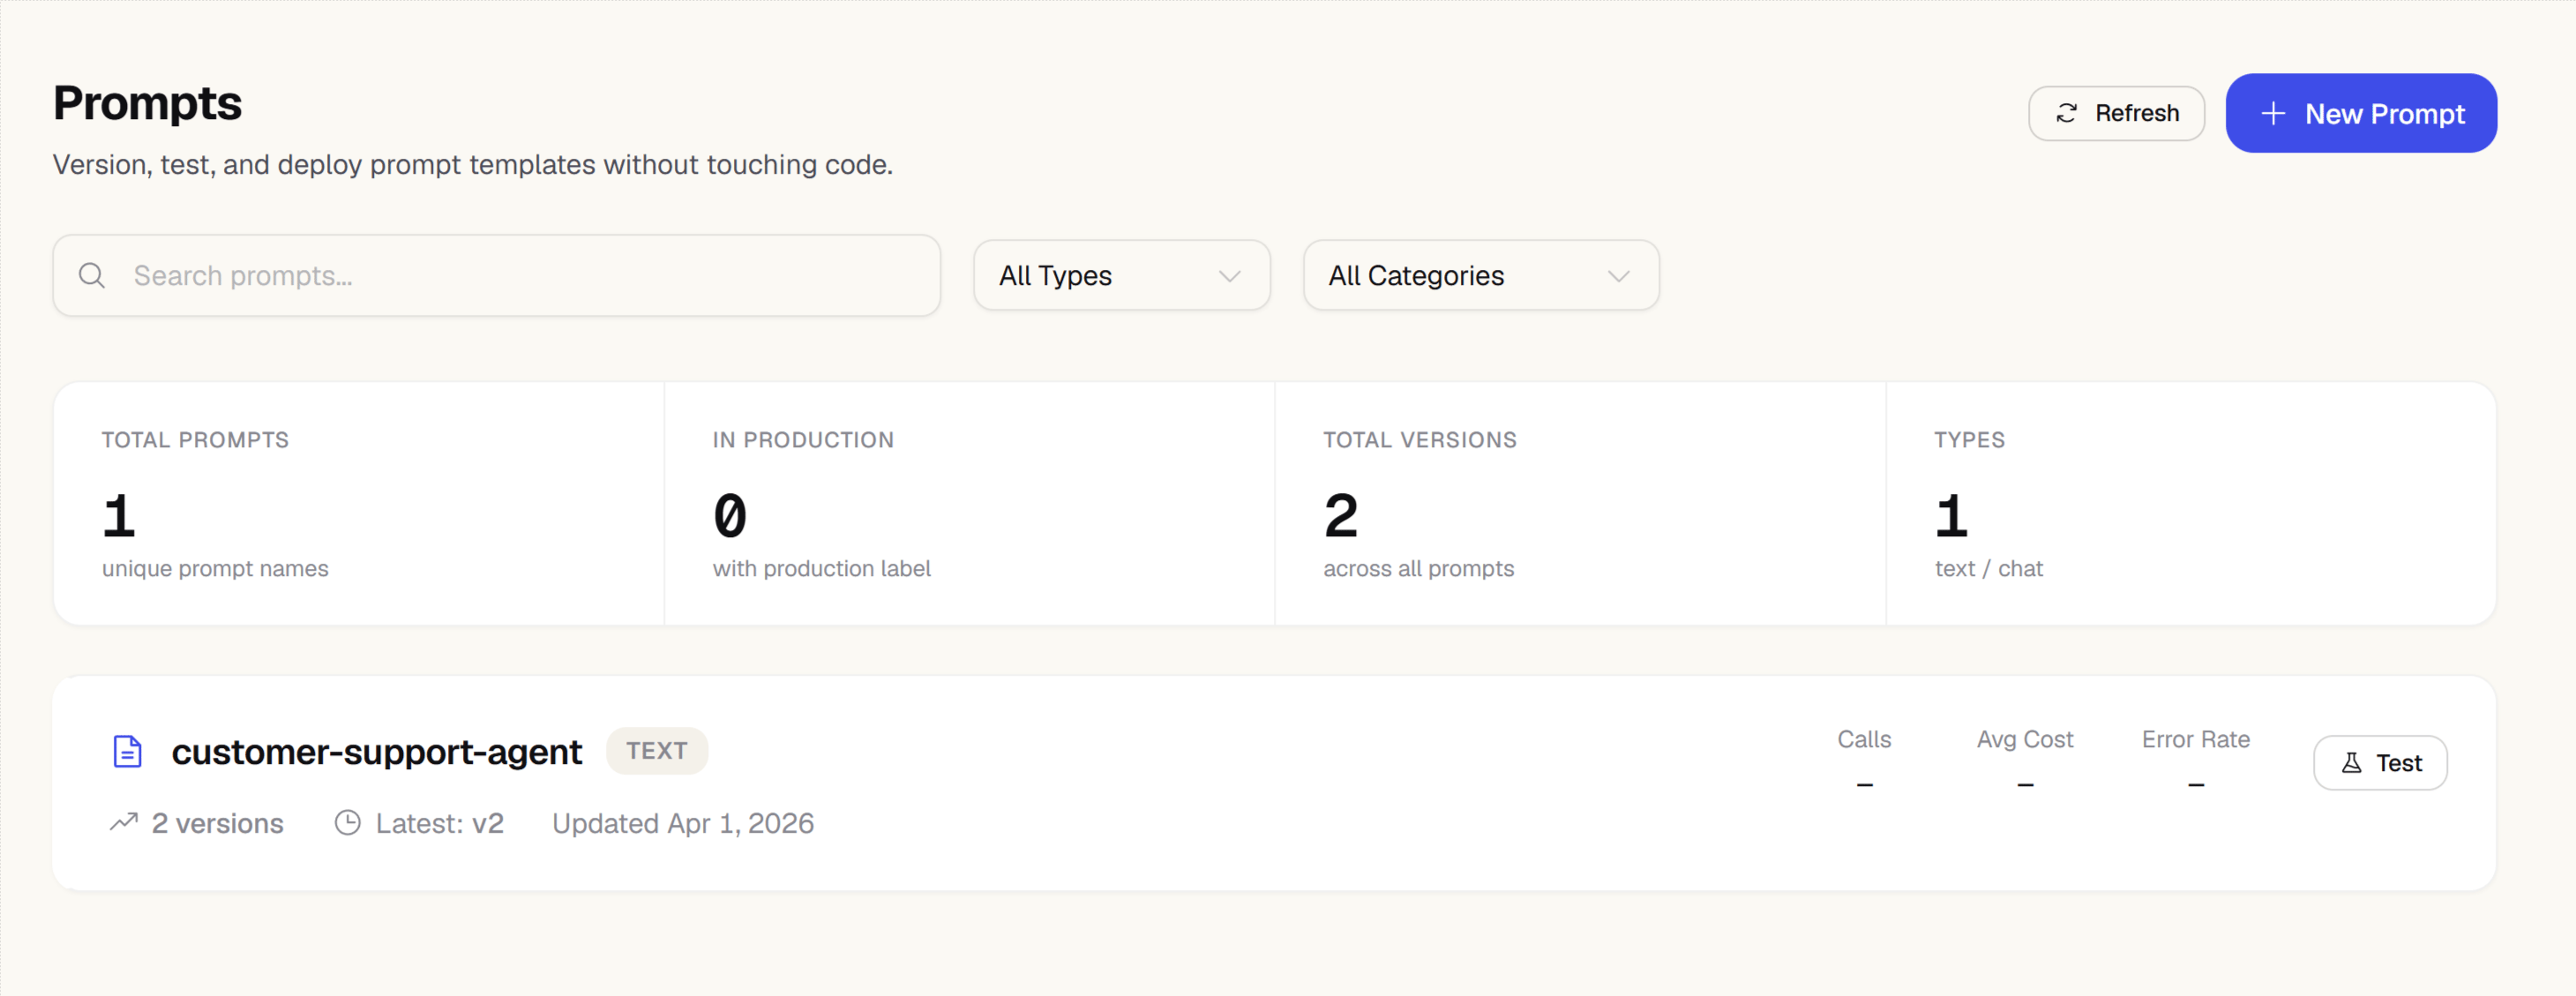
The main Prompts page shows all prompts in your project as a list. Each row shows the prompt name, the number of versions, which labels are active, and when it was last updated.
Prompts are grouped by folder. Ungrouped prompts appear first, followed by each folder's prompts — see [Organizing prompts into folders](#organizing-prompts-into-folders) below.
Click any prompt to open its detail view.
## Creating a prompt
On the main Prompts page, click **New prompt**.
Enter a slug-style name for the prompt, e.g. `support-reply` or `product-description-generator`. This name is used by the SDK to fetch the prompt at runtime.
Assign the prompt to an existing folder, or leave it ungrouped. Folders are purely organizational — you can move the prompt into a different folder later without affecting its name or version history.
* **Text** — a single string with `{{variable}}` placeholders for dynamic content
* **Chat** — an array of message objects (`role`, `content`) with placeholder support
Enter your prompt in the editor. Use `{{variable_name}}` syntax for any values you want to substitute at runtime.
Optionally fill in suggested model, temperature, and max\_tokens. These are stored with the prompt (and versioned along with it) for reference but are not enforced by the SDK — you decide whether to use them.
Assign a label, typically `staging`, to this initial version.
Write a short description of what this version contains. Commit messages appear in the version history.
Click **Save**. Version 1 is created and ready to fetch via the SDK.
## Organizing prompts into folders
As your prompt library grows, group related prompts into folders — for example, one folder per feature or per customer-facing surface. Moving a prompt to a folder never changes its name, so anything fetching it via the SDK is unaffected.
From the main Prompts page, click the actions menu next to the prompt you want to organize.
Select **Move to folder** from the menu.
Start typing a folder name — existing folder names autocomplete as you type. Enter a name that doesn't exist yet to create a new folder on the fly.
Click **Move**. The prompt now appears under that folder on the main Prompts page.
| Action | What it does |
| -------------------------- | ------------------------------------------------------------------ |
| Move to folder | Assigns the prompt to an existing or new folder |
| Move to a different folder | Re-assigns the prompt; its name and version history are unchanged |
| Remove from folder | Moves the prompt back to the ungrouped list at the top of the page |
## The prompt detail view
Opening a prompt takes you to a detail view with seven tabs:
| Tab | What it's for |
| ----------------- | ------------------------------------------------------------------------------------------------------------------------------------------------------------------------------ |
| **Versions** | Version history, labels, the quality gate, blast radius, and deployment history — the release-management surface for this prompt. |
| **Playground** | A quick side-by-side run of this draft version against whatever currently holds the `production` label, to sanity-check a change before you commit to a full comparison. |
| **Enhance** | An AI rewrite grounded in this version's real production failures — see [Enhance](#enhance) below. |
| **Analytics** | Calls, cost, and error-rate trend charts for this prompt, with version deploys marked on the timeline. |
| **Generations** | The live trace calls linked to this prompt (by version or across all versions), with per-trace correct/wrong/unsure annotation that can seed a dataset. |
| **Configuration** | Temperature, max tokens, top P, tags, and folder — editing any of these creates a new version, since a config change can affect production output as much as a wording change. |
| **Use** | Copy-paste REST, TypeScript SDK, and Python SDK snippets for fetching this prompt by label, plus the CI quality-gate snippet. |
Each version's row on the **Versions** tab also shows call count, error rate, and cost/call for the selected time window, and a **Test** button in the page header jumps you into the full [Playground](/dashboard/playground) seeded with this prompt's text.
## Labels and promotion
Labels are mutable pointers to specific prompt versions. The recommended workflow is:
1. Create a new version — it starts as a draft with no label.
2. Click **Set staging** to test it, or click **Release** to promote it directly to `production`.
3. Your application code fetches prompts by label:
```typescript theme={"theme":{"light":"github-light","dark":"one-dark-pro"}}
const prompt = await promptClient.get("support-reply", { label: "production" });
```
The label pointer updates immediately when you promote. Your running application picks up the new version on its next prompt fetch (respecting the 5-minute cache TTL, or immediately if you clear the cache).
Promoting a version to `production` fires an automatic regression check: Zespan compares evaluator scores between the new production version and the version it replaced, and — if any evaluator dropped more than 10 percentage points — creates a `quality_regression` notification. The **Versions** tab also shows this inline as an alert with **Roll back** and **Fix with AI** actions.
## Protected labels
Some labels — such as `production` — can be locked so that only users with **Admin** or **Owner** roles can move them. Configure protected labels in **Settings → Prompts**. This prevents accidental promotion from a Member-level account.
## The quality gate
Before you trust a draft version, run it through the quality gate: it scores a dataset run of the candidate version, compares that score against a scored baseline run (by default, the run tied to whatever currently holds the `production` label), and returns a pass/fail verdict.
The gate checks three things:
| Check | Default threshold |
| -------------------------------------------------------------------------------- | --------------------- |
| Average evaluator score drop vs. baseline | ≤ 3 percentage points |
| Items that regressed more than 10pp | 0 |
| Tool-call accuracy (did the agent pick the right tool, with the right arguments) | ≥ 90% |
To run the gate from the **Versions** tab:
Choose the dataset to score against and the evaluator to use as the judge.
Either click **Run over dataset** to have Zespan execute this version against every item in the dataset for you, or produce the run yourself from your own pipeline/CI (a code snippet is shown if no run is linked yet) and select it as the candidate.
Click **Run gate**. If the candidate run isn't scored yet, Zespan scores it first (this can take a few seconds — the UI polls automatically), then compares it to the baseline.
A pass/fail banner, the three threshold tiles, a per-item score table (regressions sorted first), and a per-tool accuracy breakdown.
**Run over dataset** and gate scoring (when the candidate run isn't already scored) both execute real model calls, so they require an [LLM connection](/platform/llm-connections) configured for your project. If none is configured, you'll see a **Connect a provider** prompt instead of a run.
The exact same comparison logic backs your CI pipeline: link a dataset run from your own agent code, call `POST /v1/prompts/{name}/versions/{version}/gate`, and a prompt edited in the dashboard and one edited in a pull request are held to the identical bar. See the **Use** tab for the linking snippet, or use the [`zespan-gate` CLI](/sdk/cli) to poll the route and turn the verdict into a CI exit code without writing the polling logic yourself.
## Blast radius
The **Versions** tab also shows a blast radius card: which agents (by `agent_name`) called the version currently holding the `production` label in the last 24 hours, and how many calls each made. This tells you who's actually exposed before you promote or roll back — a change that looks safe on paper can still be high-blast-radius if a critical agent depends on it.
## Deployment history
Every promotion and rollback is recorded and shown newest-first on the **Versions** tab, including which version moved to which label and whether the quality gate passed for that release.
## Rollback
**Roll back** re-points the `production` label to the version it pointed at immediately before the most recent promotion — it undoes the last release, not an arbitrary older version. Click **Roll back** next to the current production version, or from the regression alert if one is showing.
You can also roll back via ZespanPilot: "Roll back the support-reply prompt."
## Enhance
The **Enhance** tab rewrites a text prompt using its own real production failures, not generic advice. It pulls the version's recent failing generations from your traces, clusters them by root cause with an AI call, and proposes a rewrite that targets the top cause — every claim in the rewrite is backed by real trace IDs you can open.
Pick one or more goals: fix the top failure cause, cut token cost, tighten tone/format, or add safety constraints.
Click **Generate rewrite**. Zespan needs at least 5 failing generations linked to this version to ground a rewrite — with fewer, it tells you honestly rather than fabricating a generic suggestion.
The result shows the failure clusters found, the proposed rewrite, and a projected impact — clearly labeled as an estimate, not a measurement.
Edit the proposed text if you want, then save it as a new (unlabeled) draft version, or save and promote it straight to production.
Enhance is available on the **Pro** plan and above. Unlike Playground, run-over-dataset, and the quality gate's judge scoring, it does **not** require you to configure your own [LLM connection](/platform/llm-connections) — it works out of the box.
## Dependency tracking
A prompt can embed another prompt's content by reference, using an inline `@@@zespanPrompt:name=|version=@@@` (or `|label=
 ## The prompt library
The main Prompts page shows all prompts in your project as a list. Each row shows the prompt name, the number of versions, which labels are active, and when it was last updated.
Prompts are grouped by folder. Ungrouped prompts appear first, followed by each folder's prompts — see [Organizing prompts into folders](#organizing-prompts-into-folders) below.
Click any prompt to open its detail view.
## Creating a prompt
## The prompt library
The main Prompts page shows all prompts in your project as a list. Each row shows the prompt name, the number of versions, which labels are active, and when it was last updated.
Prompts are grouped by folder. Ungrouped prompts appear first, followed by each folder's prompts — see [Organizing prompts into folders](#organizing-prompts-into-folders) below.
Click any prompt to open its detail view.
## Creating a prompt